Tuesday 13 November 2012

1st collodion shoot at home ... trial and error!


These first few plates were our first attempt in the homemade darkroom without Mr Brewer looking over our shoulder giving us advice.  It didn't start off the best, I ended up getting some poultry feed calcium carbonate derived from limestone.  This was an ebay error and am currently waiting for the real white stuff.  Using the wrong cleaning agent definitely had an effect on the glass plates but at least we were getting some kind of image so not all bad!


This is our first attempt on tin plate.  It was the end of the day so the light was constantly changing and making it pretty difficult to guess the exposure which up until now wasn't giving us too much trouble.  I quite like the spookyness of this tin plate though, it could be a poster for a horror film or something.


Attempt No. 2

With these glass plates we opted to clean them with good old fashioned fairy liquid and buffing them clean.  It definitely made a different in the way the collodion fixed to the plate and eventually we managed start solving where we were going wrong with each plate.  Sometime the plates were not clean enough, sometimes light leaked when removing and replacing the dark slide.  I always like the imperfections on the plates but after a while is become irritating and I feel the need to diagnose and fix the problems.  Anyway these exposure came out pretty good and most of the plates were developed successfully.


Next week we are going to shoot some more plates, try and perfect our technique and exposure intuition!  
Can't wait to get our dark box on the road then we can take the camera out and do some landscapes.

P.S NO EDITING HAS BEEN APPLIED TO THESE IMAGES, THEY HAVE JUST BEEN SCANNED AND UPLOADED

Wednesday 7 November 2012

For now .... we have a dark box

Here's our travel size darkroom built kindly by Mike's dad based on other darkbox/darkroom ideas found all over google.  Just need some legs and a giant black sock.


Just given it a quick primer coat then a spray with regular matt black paint.  This picture is from midway through the process so it ain't so patchy now!


Can't wait to get my 10x8 old school camera from the states in December, this will be the perfect size for the plates when we're on the road.  Undecided whether or not to build shelves into the box or build a box within the box that can store most things when we are out and about in a car.  


Wednesday 31 October 2012

Camera Obscura with WWII aerial lens : Wet Plate Monster Project


After taking the shutter out the lens and putting it all back together we decided to test this bad boy out with an old fashioned camera obscura using the window and curtains.


The image below is what was projected on the wall on the other wide of the room approximately 4 metres away.  The grey areas you can see are bricks and to give it some context of size on the right of the image you can just make out a radiator.


To give us some kind of idea of what it would be like work with focus on huge plates we used a towel which measured about 25" x 50".


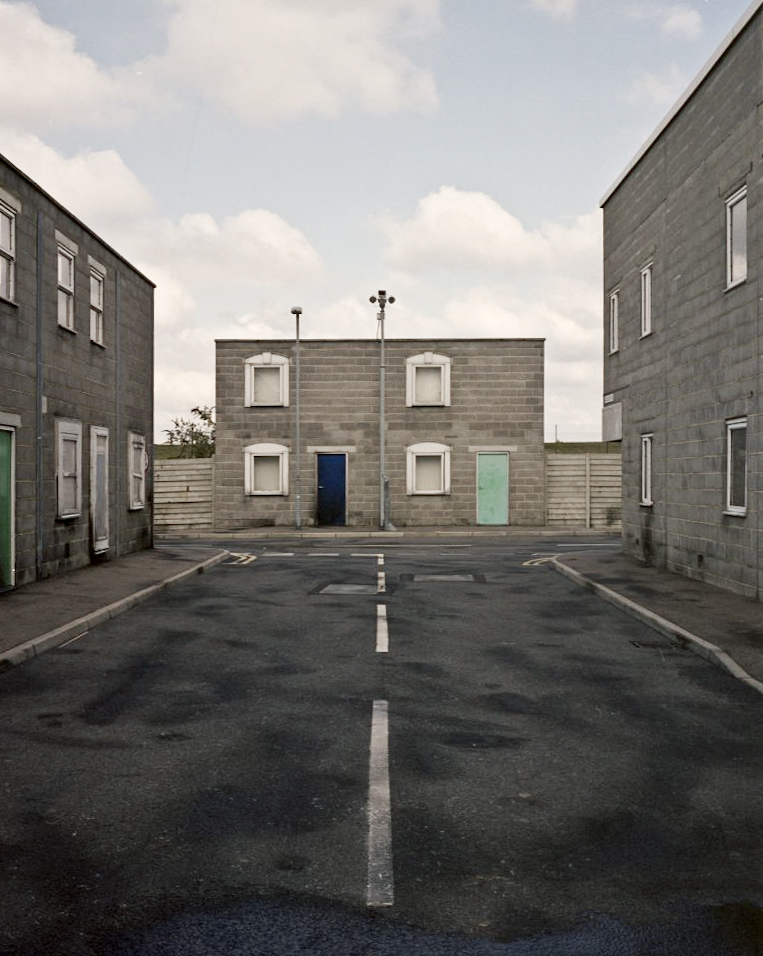
And below is another projection on the towel of the house behind which is at least 25 metres away.


Focussing the image was a matter of moving the towel a few centimeters in either direction.  This is the lens fully open but when we tried with the lens closed down we experience vignetting, I reckon this is down to the aerial camera being design for 9"x18" photo which at such height would need to be closed down to get any kind of detail .... I think.


Next .... thinking of ideas for the "camera back/darkroom space".  We've got something in the pipeline but we think it won't be until after Christmas till we get a little further with this.  Until then we have all the chemicals and silver we need to be shooting with my 5x4.

Tuesday 23 October 2012

The Beginnings of a Wet Plate Monster

So Mikey Simpson and I purchased this Kodak 36 inch f:8 Huge Vintage Aerial.  Our aim is to build an epic wet plate camera with some alternative methods.  The lens weighs 10kgs and with the collar is a big hunk of metal and glass.


 I wanted to take a look inside and we decided we should take out the shutter because it was one speed and it slightly obscured the edges of the lens.  Apparently the glass on this thing is radioactive, that's why it will be stored at Mike's house.


Above you can see the shutter mechanism, the shutter control button collar and various washers and clips which held it all in place.  The lens came apart simple enough and with only a little man-handling the shutter components soon came out too ... easy so far!


Just had to put the aperture control and iris back in and it's good to go.

We got the lens, now we got to find a way of mounting/supporting the beast and come up with some kind of camera back!